

This comprehensive guide will help you create a safe and effective home ice bath experience, addressing potential risks, and providing practical advice on temperature, duration, and overall safety.
How To Make An At Home Ice Bath?
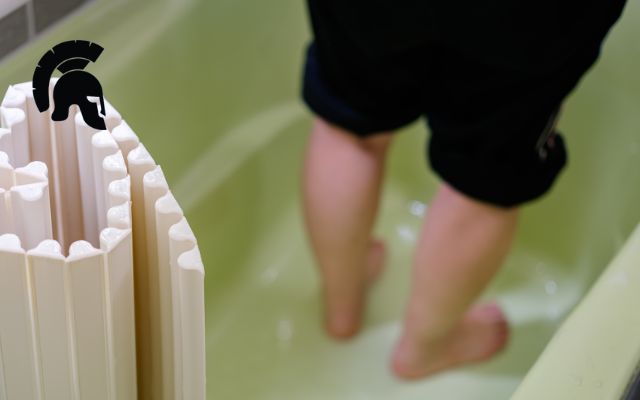
Method 1: Using a Bathtub
A bathtub is one of the simplest and most accessible options for creating an ice bath at home. It allows you to immerse your entire body in cold water, making it a great choice for those looking to experience the benefits of cold therapy without needing specialized equipment.Instructions:
- Prepare the Bathtub: Start by filling your bathtub with cold water until it reaches a comfortable level for immersion.
- Add Ice: Gradually add ice to the water. Aim for a temperature between 50°F and 60°F (10°C to 15°C). You can use about 6 bags of ice, adjusting based on your preference.
- Set a Timer: Limit your time in the bath to around 10 minutes. If you’re new to ice baths, start with just 2-3 minutes and gradually increase your duration as you become accustomed to the cold.
- Enter the Ice Bath: Take slow, controlled breaths as you enter the tub. Focus on calming your breathing throughout your session.
- Exit and Warm Up: Once your timer goes off, exit the bath, dry off with a towel, and put on warm clothing to help your body recover.
Method 2: Using SubZero Ice Baths
SubZero Ice Baths are becoming increasingly popular due to their convenience and ease of use. These specialized tubs are designed for cold therapy, allowing you to enjoy the benefits of an ice bath without the hassle of manually adding ice or managing water temperature.Instructions:
- Set Up the SubZero Ice Bath: Follow the manufacturer’s instructions to set up your SubZero Ice Bath. Typically, you’ll need to fill it with water and plug it in.
- Adjust Temperature Settings: Use the temperature control feature to set your desired cold temperature, usually around 39°F to 60°F (4°C to 15°C).
- Enter the Bath: Once the water reaches the desired temperature, slowly lower yourself into the tub.
- Monitor Your Time: Similar to traditional ice baths, limit your session to about 10 minutes.
- Warm Up Afterward: After your session, dry off and dress warmly to help your body return to a normal temperature.
Method 3: Using a Chest Freezer
Converting a chest freezer into an ice bath is an innovative option that provides consistent cold temperatures and can be more cost-effective in the long run. This method requires some initial setup but offers a great way to maintain cold water for regular use.Instructions:
- Prepare the Chest Freezer: Ensure that your chest freezer is clean and waterproofed if necessary. Seal any seams with marine sealant to prevent leaks.
- Fill with Water: Fill the freezer with water until it’s at a suitable level for immersion.
- Adjust Temperature: Use a temperature controller (if available) to set and maintain your desired cold temperature, usually below 60°F (15°C).
- Add Ice as Needed: If you’re not using a chiller, you may need to add ice periodically to keep the water cold.
- Enter Carefully: When ready, carefully enter the freezer for your ice bath session, monitoring your time as before.
Safety First
Potential Risks
Ice baths, despite their potential benefits, present certain risks if not practiced safely. Frostbite, a serious condition, can occur if the water is too cold for too long. Hypothermia, a life-threatening condition involving dangerously low body temperature, is another significant risk. Other potential injuries, such as slips and falls within the tub, are also a concern.
Pre-existing medical conditions can significantly affect how your body reacts to cold exposure. High blood pressure, heart conditions, or circulation problems may be negatively impacted. Consult a doctor before introducing cold therapy into your routine to discuss any potential risks specific to your health situation. A physician can advise you on the suitability of cold therapy based on your medical history and condition.
It’s important to remember that individual responses to cold therapy vary. What one person finds comfortable, another may find uncomfortable.
Individual Tolerance
Everyone experiences cold differently; a five-minute immersion might be challenging for someone new to ice baths, while a more experienced person might tolerate longer durations. Start with shorter durations and slowly increase the time you spend in the bath as you become more accustomed to the cold.
Always assess your body’s response before extending your time. Early symptoms, such as shivering or discomfort, are essential signs to stop and regulate the immersion.
Pre-existing Conditions
If you have heart conditions, circulation problems, or other health concerns, consult your physician before incorporating cold therapy into your routine. Some conditions may be exacerbated or negatively affected by cold exposure.
Medical advice specific to your situation is crucial to ensure safety. Cold therapy might not be suitable for everyone, and professional guidance is essential for making an informed decision.
Signs of Problems
Recognizing and responding to warning signs is crucial. Symptoms such as shivering, nausea, dizziness, or difficulty breathing indicate that you are likely experiencing an adverse reaction to the cold therapy and need to exit the bath immediately.
Knowing what to do in case of unexpected issues will assist in preventing injuries and illnesses. If you notice any of these symptoms, get out of the ice bath immediately and warm up.
Choosing Your Equipment and Materials
Container Selection
Consider using a large, sturdy container to hold the ice bath, such as a plastic or fiberglass tub, large bucket, or other suitable containers.
The container should be chosen for durability and resistance to water damage or cold, especially if you plan on using it for long periods. It must maintain the desired water temperature for the duration.
Appropriate size is crucial. Choose a tub big enough for you to comfortably immerse yourself without touching the sides. The container should be large enough for adequate immersion.
Ice Acquisition
The quantity of ice depends on the desired temperature and duration of your ice bath. Calculate how much ice is required to maintain a comfortable temperature.
There are numerous ice sources, such as grocery stores, supermarkets, and even self-made ice. Choosing an appropriate ice source based on your convenience and needs is important.
Water Quality
Using clean water is essential. Clean water is critical for a safe immersion experience. Filtered or boiled water ensures the ice bath water is free from contaminants.
Clean water, free of contaminants, is important to avoid potential health risks or irritations. Consider using filtered water or boiling water before use.
Preparation and Setup
Mixing Ice and Water
Start with a small amount of water and gradually add ice to avoid sudden temperature drops. Slowly add ice to maintain a controlled temperature change.
This method ensures a gradual temperature change, minimizing sudden drops in temperature that can lead to shock or discomfort. Always add ice slowly and steadily.
This method avoids potential rapid temperature drops. Monitoring temperature is crucial for a safe and comfortable experience.
Maintaining Water Level
Maintain a system to regulate the water temperature and adjust the ice as needed. Ensure the water level is monitored and replenished during use. Have a system for monitoring and adjusting the water levels to maintain the desired temperature.
Preventing Overcooling
Constantly monitor the water temperature to prevent it from becoming too cold. A consistent check is crucial for safety and comfort.
Techniques for an Effective Ice Bath
Benefits of Ice Baths
Cold therapy causes blood vessels to constrict, then dilate, enhancing blood flow and aiding tissue repair. This promotes faster muscle recovery and reduces inflammation. Benefits include pain reduction and faster healing.
Scientific research shows the impact of cold therapy on pain and inflammation. Cold therapy can reduce swelling in injuries and promote quicker muscle recovery. This can improve athletic performance.
Understanding the physiological processes involved helps users to maximize the benefits of cold therapy.
Alternatives to Ice Baths
Cold water immersion, cold packs, and contrast therapy (alternating between hot and cold) offer similar benefits to ice baths. These alternatives are helpful, but each has unique advantages and disadvantages.
Cold water immersion can be done at home, but its temperature is more challenging to control and maintain. Contrast therapy combines hot and cold, providing a more varied experience.
Different methods of cold therapy cater to individual preferences and needs.
Specific Use Cases
Muscle Recovery
Post-exercise ice baths can reduce muscle soreness and stiffness. The benefits of cold therapy are well-documented in sports performance and recovery.
Cold therapy reduces inflammation and discomfort post-exercise. Implementing ice bath routines in workouts can maximize recovery.
Reducing Inflammation
Ice baths help reduce inflammation by constricting blood vessels. Inflammation is a natural response to injury, and ice baths can help control this response.
Cold therapy reduces swelling by constricting blood vessels. Incorporating ice baths in injury recovery can help patients heal quicker.
Incorporating into Routine
Timing ice baths after exercise is beneficial for muscle recovery. Consistency in an ice bath routine is key to reaping its benefits.
Conclusion
Ice baths can provide benefits, but safety is paramount. Proper preparation, consistent monitoring, and awareness of your body’s reaction are crucial for a positive and safe experience. Consult a doctor before starting cold therapy if needed. Always prioritize safety when using ice baths.